 |
| Disclaimer: I was lazy and took photos with my iphone. I apologize to anyone reading this for the out of focus, grainy images, and I apologize to my DSLR camera- next time I'll dust you off and let you do your thing. |
So, in college I worked at an amazing summer camp.
Every
year, the staff got at least 3 different new t-shirts, plus our choice
of leftover shirts from previous years. I have a collection of probably
25-30 tees just from this camp.

I don't wear t-shirts as much these days, but have saved each and every summer camp shirt to make a t-shirt quilt. You know, when I get around to it. Someday.

But I digress. This isn't about t-shirts or summer camp, no matter how awesome said summer camp may be. (But seriously, if you're from Colorado and have kids who are 8 or older, you're neglecting them if you don't send them here.) But you'll see why the t-shirt story is important shortly. Anyway, back to the barefoot sandals.

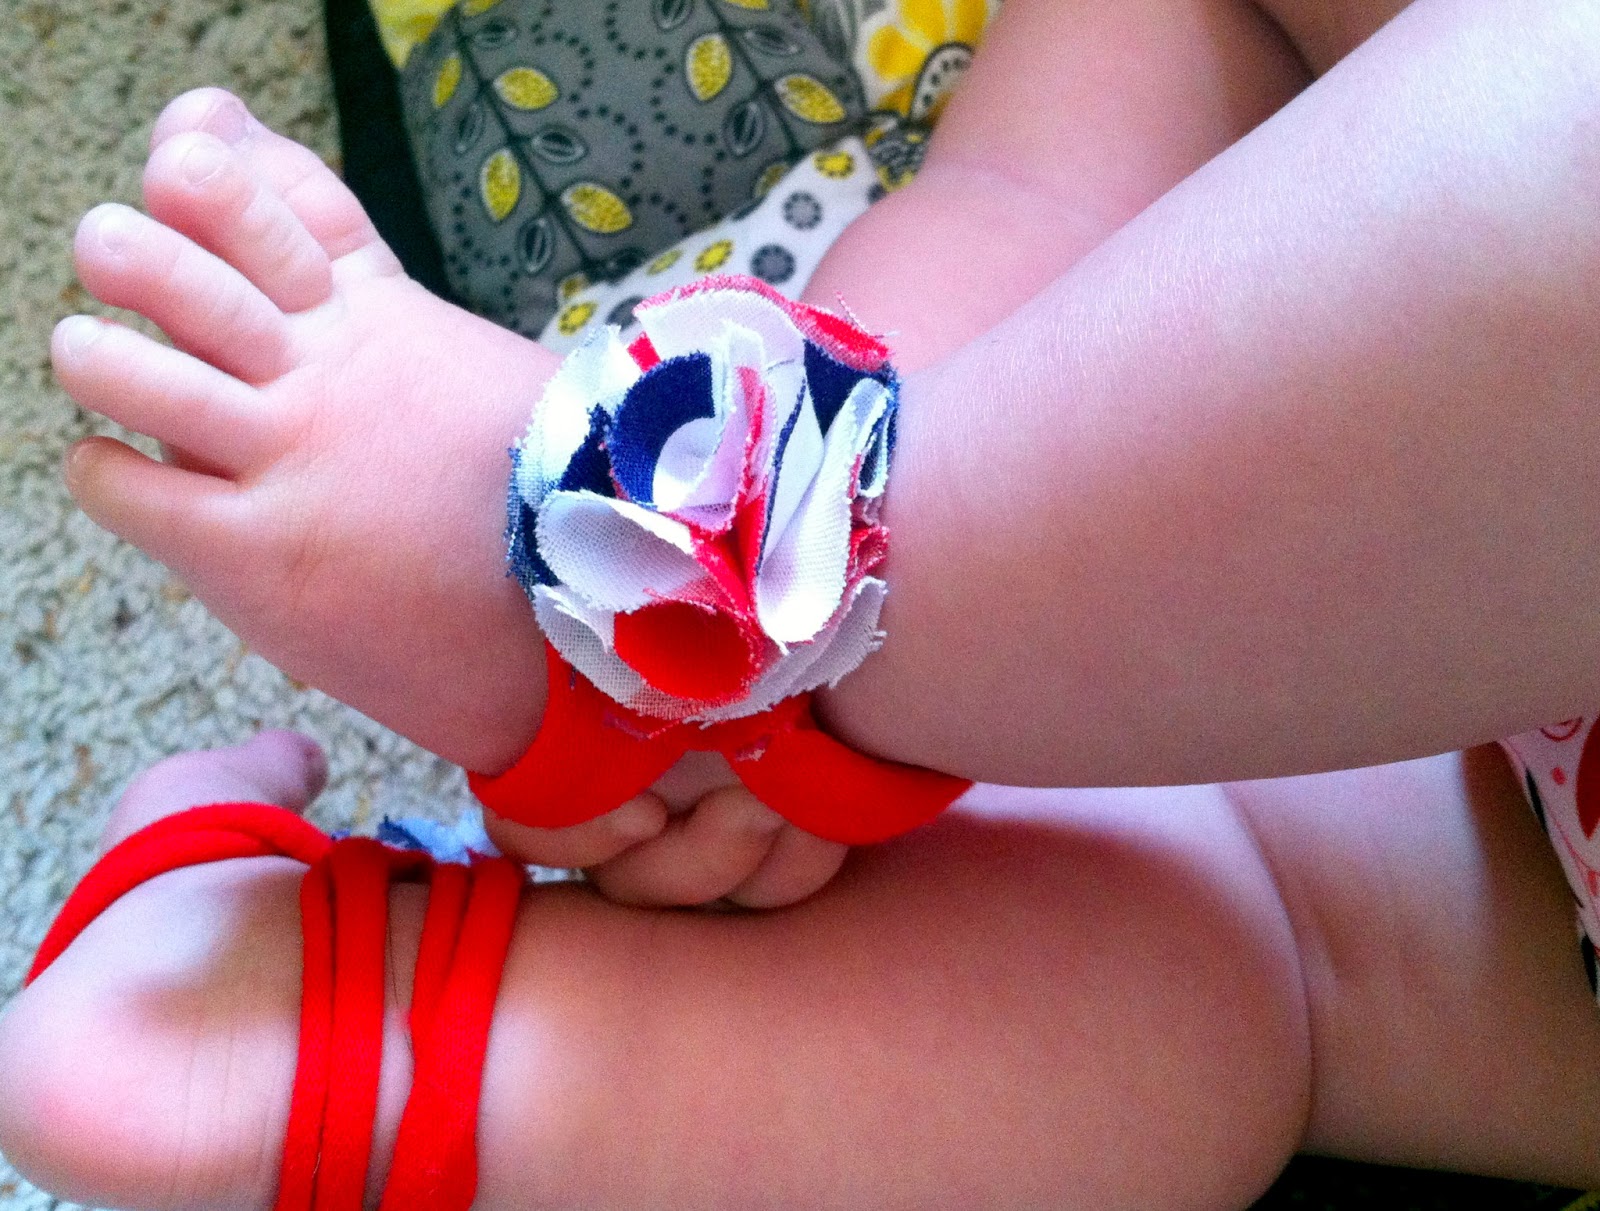
Aren't they adorable?


Want to make your own?
 First,
get your pieces ready. Lay out your t-shirt and cut off the bottom
hem. Then, cut a strip straight across off of the bottom of your tee.
Mine was about 1.5 inches wide, but I think I would go with about 1"
next time. Set your shirt aside. Now you should have a big ring of
t-shirt fabric. Stretch the ring until it starts to curl up and resemble
an oversized noodle. Make one cut through the ring so that it becomes a
long strip.
First,
get your pieces ready. Lay out your t-shirt and cut off the bottom
hem. Then, cut a strip straight across off of the bottom of your tee.
Mine was about 1.5 inches wide, but I think I would go with about 1"
next time. Set your shirt aside. Now you should have a big ring of
t-shirt fabric. Stretch the ring until it starts to curl up and resemble
an oversized noodle. Make one cut through the ring so that it becomes a
long strip.
Next, Measure your baby's feet, or eyeball it if you're brave. You want a strip of fabric that's long enough to circle around from the top of baby's foot, to the sole at the arch. For my 4 month old, I cut 4 inch strips from my big t-shirt noodle. You'll need to cut 6 strips of the same size for the sandals pictured, but you could also cut only 4 strips and this would work. LJ's feet are so tiny, I think next time I'll do only 4 strips.
You'll also want to eyeball your baby's feet and decide how big you want your fabric flower to be. I went for one that was close to the width of her foot, but it just depends on your preference. You'll want to make a circle exactly the size of the flower you want. I happened to have a spool of thread to trace, but you can use any round object you can find that's the size you want, or you can just draw a circle that size on some paper and cut it out. Using your tracing object, trace out 2 circles on to your t-shirt. These will be the tops of the sandals, where the flowers will attach.
Next,
grab the t-shirt you set aside, or whatever you want to use for your
flower fabric. For my flowers, I used a leftover scrap from the dress
she's wearing them with. Trace 18 of your circles onto your fabric
(you'll need 9 for each flower). If you're doing a gem/pearl/button
center on your flower, you'll only need 16 circles. Cut out all of your
circles.


 Glue down 3 more petals, until your base circle is covered.


I don't wear t-shirts as much these days, but have saved each and every summer camp shirt to make a t-shirt quilt. You know, when I get around to it. Someday.

But I digress. This isn't about t-shirts or summer camp, no matter how awesome said summer camp may be. (But seriously, if you're from Colorado and have kids who are 8 or older, you're neglecting them if you don't send them here.) But you'll see why the t-shirt story is important shortly. Anyway, back to the barefoot sandals.

Aren't they adorable?

I
discovered this style of baby shoes existed just yesterday, and LJ
still NEEDS a pair of shoes to go with her 4th of July outfit, which
she'll be wearing in 6 days. They looked easy enough to make, so I
looked at a few different methods, and combined them into one that I
thought would be super easy. And it was!

Want to make your own?
Here's what you'll need:
An old T-shirt you won't mind cutting
Pen or fabric marker
Fabric glue or a hot glue gun
Pudgy baby feet to put them on.
And that's it!
And that's it!
{optional}
quilting weight cotton, lace, tulle, or other fabric for your fabric flowers.
pearls, gems, or buttons if you want one in the center of your flower.
pinking shears
 First,
get your pieces ready. Lay out your t-shirt and cut off the bottom
hem. Then, cut a strip straight across off of the bottom of your tee.
Mine was about 1.5 inches wide, but I think I would go with about 1"
next time. Set your shirt aside. Now you should have a big ring of
t-shirt fabric. Stretch the ring until it starts to curl up and resemble
an oversized noodle. Make one cut through the ring so that it becomes a
long strip.
First,
get your pieces ready. Lay out your t-shirt and cut off the bottom
hem. Then, cut a strip straight across off of the bottom of your tee.
Mine was about 1.5 inches wide, but I think I would go with about 1"
next time. Set your shirt aside. Now you should have a big ring of
t-shirt fabric. Stretch the ring until it starts to curl up and resemble
an oversized noodle. Make one cut through the ring so that it becomes a
long strip. Next, Measure your baby's feet, or eyeball it if you're brave. You want a strip of fabric that's long enough to circle around from the top of baby's foot, to the sole at the arch. For my 4 month old, I cut 4 inch strips from my big t-shirt noodle. You'll need to cut 6 strips of the same size for the sandals pictured, but you could also cut only 4 strips and this would work. LJ's feet are so tiny, I think next time I'll do only 4 strips.
You'll also want to eyeball your baby's feet and decide how big you want your fabric flower to be. I went for one that was close to the width of her foot, but it just depends on your preference. You'll want to make a circle exactly the size of the flower you want. I happened to have a spool of thread to trace, but you can use any round object you can find that's the size you want, or you can just draw a circle that size on some paper and cut it out. Using your tracing object, trace out 2 circles on to your t-shirt. These will be the tops of the sandals, where the flowers will attach.
 |
| Pieces for one shoe. |
You
should now have 6 strips of fabric, 2 base circles, and 18 flower
fabric circles. Getting those ready was the longest part of this craft,
and once you do that, the rest will only take a few minutes.
Grab one of your flower circles and put a tiny dab of glue in the center, then fold in half and pinch until the glue sets.

It should be able to sit on its own and keep a semi-circle shape.

Next, put a dab of glue in the middle of the flower, right at the straight edge. Fold in half again and pinch.

The petal should hold this shape on its own.
Repeat x7 so you have 8 petals made. Leave your base circle and one other fabric circle as is.
 | |||
| 8 petals, one flower fabric circle, one base circle. |
Almost there.
Now lay your base circle right side up (if yours has a right side). Put a tiny dab of glue on the little point of one petal.

Glue your petal down as pictured.


At this point you should have 4 petals glued to your base, 4 loose petals, and your extra circle. Now, glue your second layer of petals down, alternating the placement so the center of your 2nd layer petal covers the crack between the first layer petals, as pictured below.

Add your remaining 3 petals so your flower now has 2 layers with 4 petals each.
At this point, if you want to do a flower with a gem or pearl center, just glue down your gem or pearl. I have neither of those things, so I used a button to give a general idea of what the flower will look like.

If you prefer a fluffier, pom-pom like flower, grab that 9th circle you cut out.
Fold it in half as before.

This time, begin rolling your semi-circle from one end.
 | |||||||||
| like I said, iphone pictures. |

Dab a bit of glue toward the end of rolling, to keep it together.
Put a decent amount of glue on the point of your cone, and press the cone down into it until it sets.
 | |||

To give it some fluff, dab some glue on the top of each of the 4 petals in the second row.
 | ||
| See that dab of glue at 12:00? |


Time to add straps. Flip your flower upside down.

I made a line of hot glue down one side, and attached 3 of the straps like this.


Finish all straps and repeat for your second shoe, and you're done!

Now the fun part. Put baby's foot through all 3 rings of the sandal.

Pull the rear one or two straps behind baby's heel. I prefer the look of two straps on the heel.
She's ready to hit the runway!
Some other flower variations:
This flower was cut with pinking shears.

Button (or gem or pearl) center.
Remember that lonnnnng strip of tshirt you cut into strips? The remainder rolls up into a cute rose! This shoe would literally take 2 minutes to make.

The possibilities are really pretty endless with these sandals. You can
pretty much make and attach any fabric flower you like, or buy pre-made ones at walmart the craft store. Instead of flowers, these would look great with bows, fabric yo yos, even large decorative buttons. Can you think of anything else that would be adorable on these shoes?
 |
| They even go with fluffy baby butt, but really, what doesn't? |