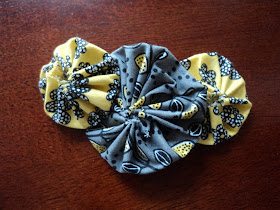
Fabric yoyos are a great way to embellish almost anything. They add color and texture to sweaters, shoes, pillows, scarves... cats, you name it. They're incredibly quick and simple to make too!
Start by deciding how big you want the diameter of your yoyo to be. You will need to cut a circle of fabric approximately twice as large as you want your yoyo. So for a 4" yoyo, I would need to start with a circle that is 8". You can use a compass if that's your thing. I prefer to find things around the house that I can just trace.
 | |||
| This large soup can works great. |
Once you find your circular item, you can do one of two things. You can trace it on to paper, cardstock, or old cereal boxes to use as a pattern in the future, or you can just trace it directly onto the wrong side of your fabric. I clearly prefer the latter.
Once you have your circles traced, cut them out carefully and start stitching all the way around the circumference of the circle, about 1/8 of an inch away from the edge. You will want to use enough thread so that there is at least an inch of "slack" left over on each end.
 |
| For a closed center, these stitches are about 1/4 inch long. |
Determine what type of yoyo you want before you determine your stitch length. Longer stitches give the yoyo a closed center, like the ones in the title photo above. If you want an open center (see below), use shorter, closer stitches.
 |
| Shorter stitches will result in an open center, similar to this one. |
Get the stitch all the way around your circle...
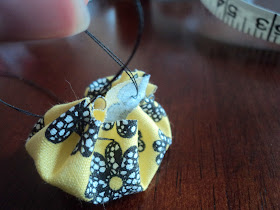
Then pull the loose ends together so that your yoyo starts to close like a drawstring bag. Make sure the right side of your fabric is on the outside when you do this.
Continue pulling to your desired tautness, and smash the yoyo flat. Sometimes you will have to reach through the hole in the top in order to get it just right.
Once you get it to your desired shape and tautness, tie the loose ends together tightly as close to the fabric as you can, and cut off the excess thread.
And there you have it: your finished yoyo!
Just sew, pin, or duct tape onto whatever you want to embellish!
 |


No comments:
Post a Comment