Showing posts with label fabric scraps. Show all posts

Wednesday, July 24, 2013

{getting crafty} DIY Headband Organization (and Tutorial)


I swore I'd never be one of those parents who decked their daughters out in tons of flowers and bows.  


But that was before I had a daughter.
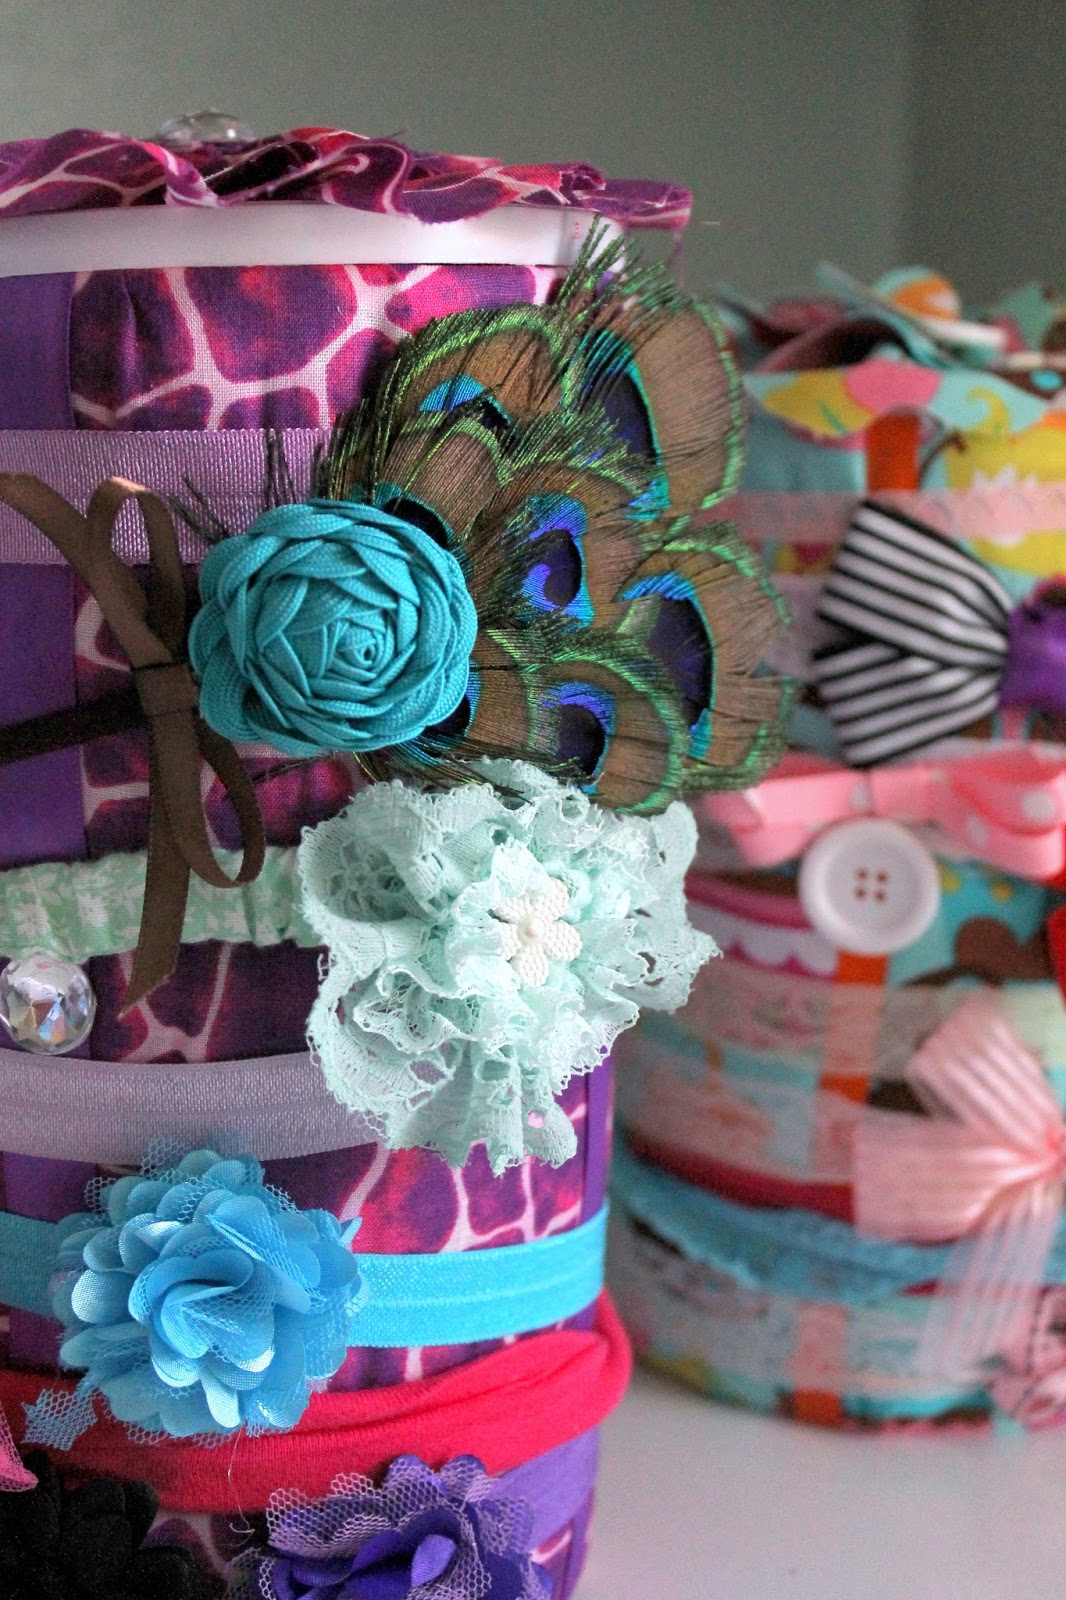


Now, I want her to have ALL THE HAIR DECOR.  It's a difficult feeling to explain, really.


But, I needed a way to organize these things so I can see each one. Cue the Pinterest search. I found several methods that involved wrapping scrapbook paper around various canisters, and this is just my take on those.  This craft is easy enough for beginners, and I was able to make both canisters in about 45 minutes. 

Here's the tutorial if you'd like to play along.


{what you'll need}
  • empty food canisters with lids (I used oatmeal and soy protein containers)
  • scraps of fabric
  • quilt batting (I had medium loft)
  • ribbon
  • other embellishments (buttons, gems, brooches, etc)
  • hot glue gun


{what to do}

Start by wrapping your clean, empty canister in quilt batting. Cut a strip long enough to wrap around, and make it just a bit shorter than the height of your canister, so the lid will still fit.


Secure with hot glue.


Repeat this step with your fabric, but make it just a bit longer than your canister (see picture). A half inch on either side should do.


Secure with your hot glue, wrapping extra length around the top and bottom of your canister, as pictured.


Time to decorate the lid. Start with a strip of fabric as wide as the radius of your lid (see photo). Mine was 30 inches long. If you don't have 30 inches, you can always attach two or more strips while you work.

That really faint pencil line is the radius.


Fold your fabric to make a pleat on one end, making the top of the pleat wider than the bottom. Secure at the bottom with a drop of hot glue.


Make a second pleat on top of the first. Secure again with glue.


Just keep doing this. 


Eventually you'll have a circle. Trim that extra part off of the top and tuck the edge under.


Take the remainder of your fabric strip and trim off a good 1.5 - 2 inches so you have a narrower strip.


Start a fan fold at the end of one strip. Stop after every fold to put a small dab of glue in each little pocket on ONE SIDE ONLY, as pictured. 


In my example I'm using the left side. You can see a small dab of glue toward the top, in an open pocket.


After several folds, your strip should look like this. I made 15 folds.
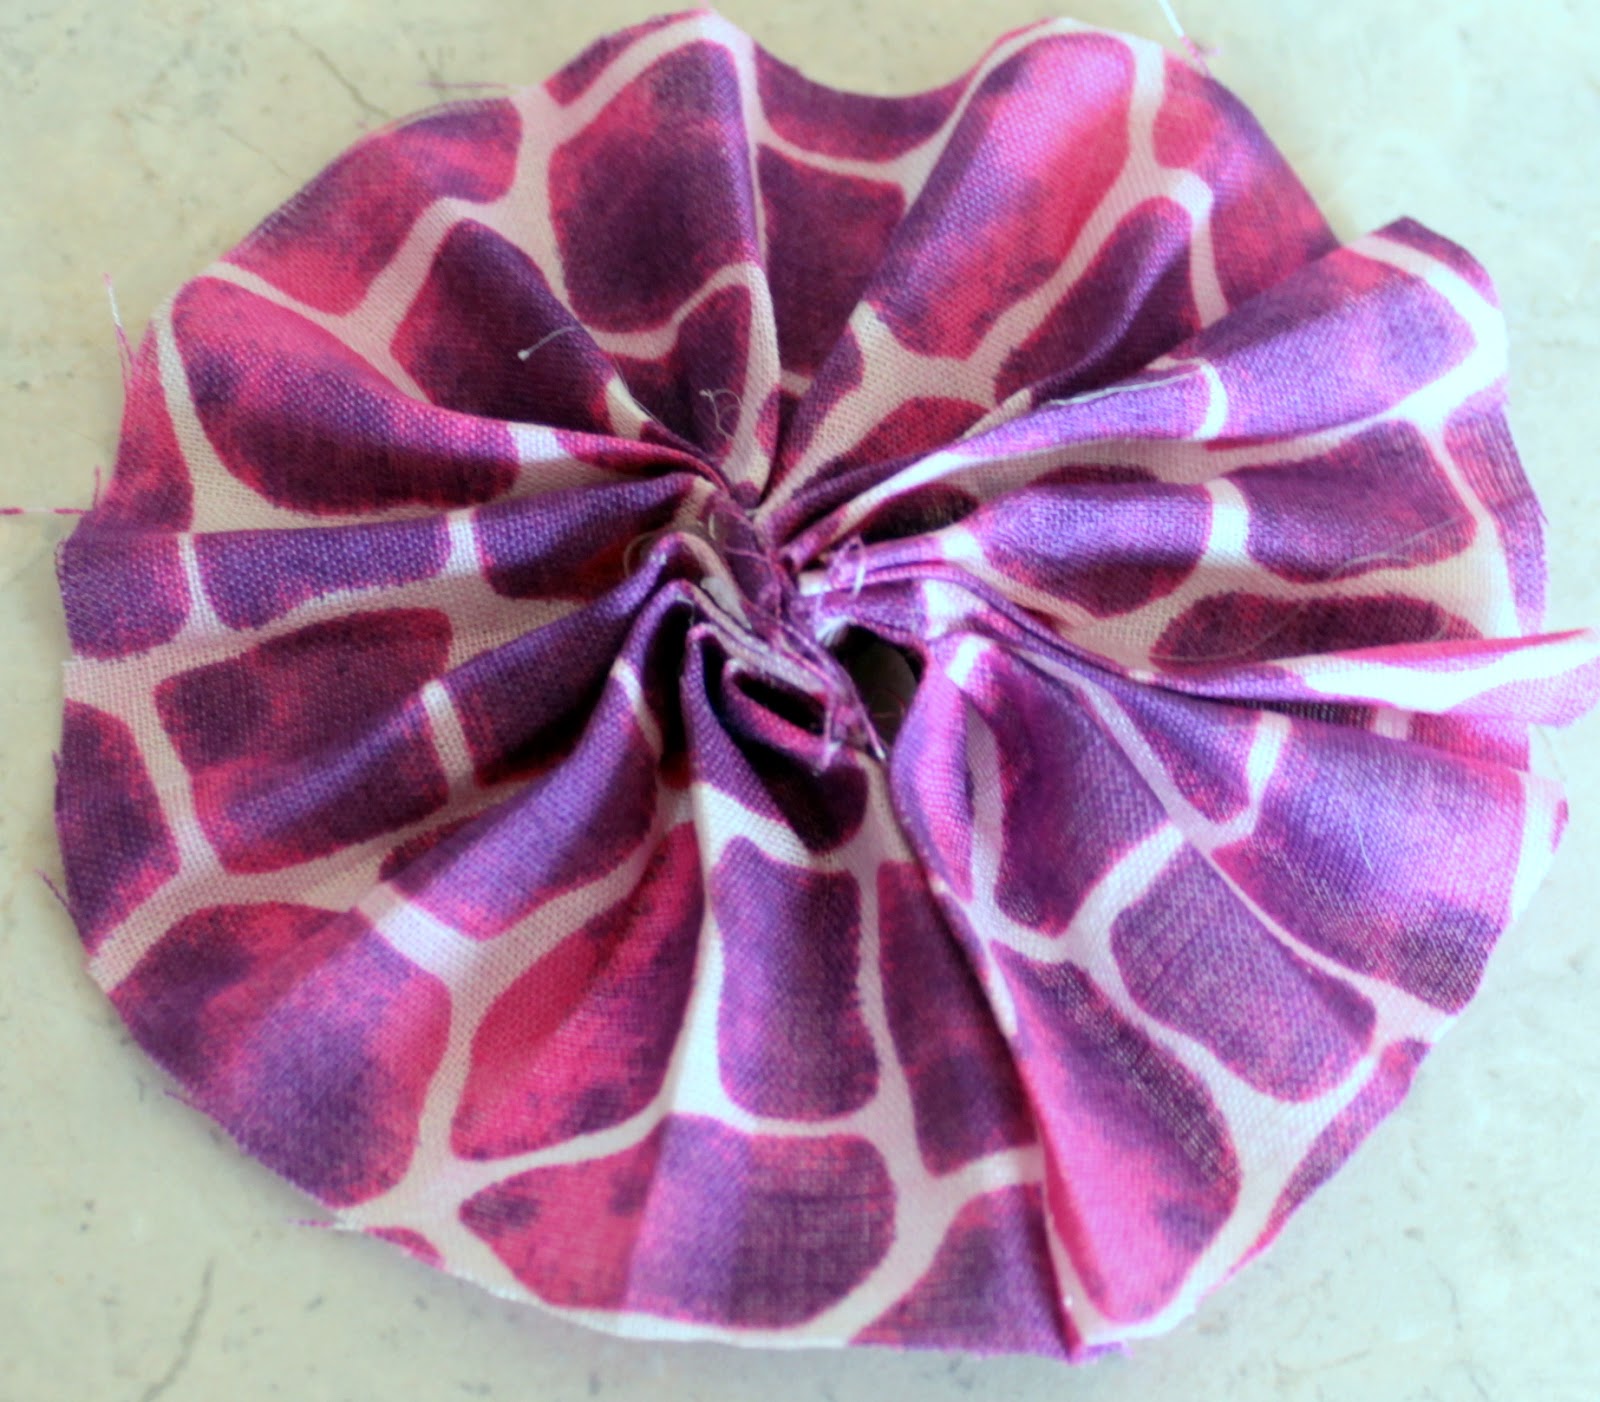


Once you've made several folds, bring the open ends together and secure them using your hot glue. 


Glue this on to your big circle, and glue the big circle on to your lid. 


Embellish the center.


Almost done!
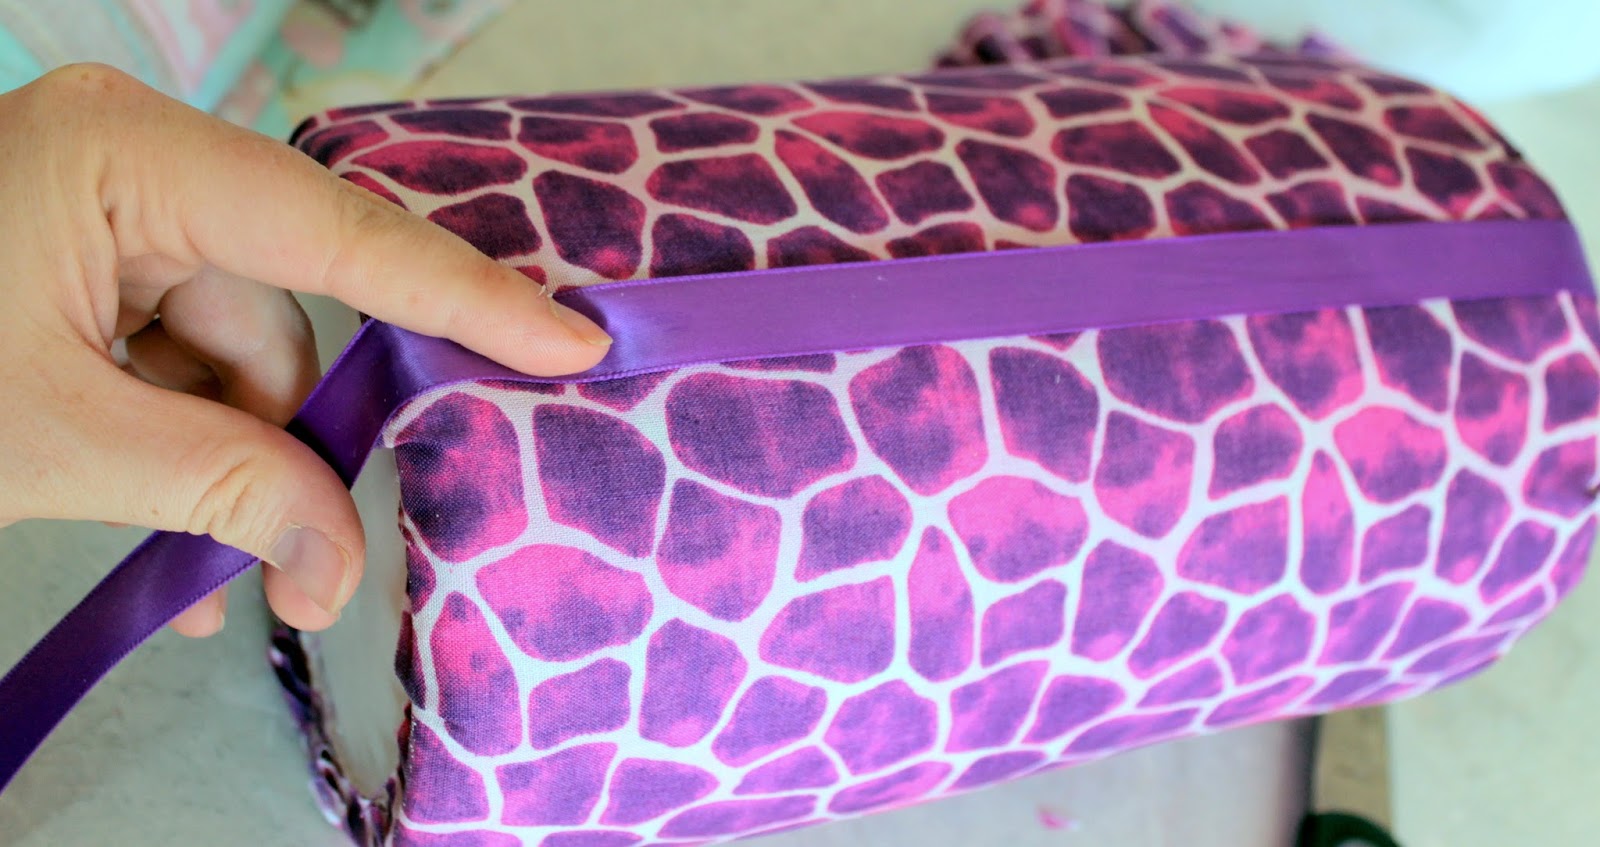

Measure a strip of ribbon about an inch longer than your canister. Cut 4 strips this length.


Might as well cover that seam while you're at it. 


Wrap one end of the ribbon over the top of the rim and secure it down with glue. Pull it taught over your canister, wrap the other end around the bottom, and glue.


Repeat this step with your remaining ribbons, gluing them at approximately 12:00, 3:00, 6:00, and 9:00 on the canister.


Besides covering the seams, these are great for pinning barrettes and hairpins.


Add another embellishment on the center of each ribbon strip, and you're done! 


You can wrap headbands around this, pin clips to the ribbons, and use the inside of the canister for small hair ties or other accessories. 


Or in my case, all the other headbands I didn't have room for.


Flower variation for the lid:  

For a different look, I traced my lid on to the wrong side of my fabric, then cut out random cloudlike shapes to make a piece that's larger than the lid. 


I did this again, but made my second little cloud about the size of my lid. 

Repeat until you have 5 little cloud shapes, each one smaller than the last. 


Layer them on your lid, starting with the largest cloud, and finishing with the smallest, gluing each layer down as you go. Embellish the center, and you're finished. 


Now, throw some headbands over these puppies and get ready to feel a bit more organized!


Monday, June 24, 2013

{a new sewing adventure} Baby Bow Sandals!


Well I've had a not-so-brief hiatus, due to a pregnancy that made me very sick but resulted in a gorgeous baby GIRL! Then there was the whole trying to balance two kids thing, but I'm back in the swing of things and hope to keep up with {super important things like} my blog this time.

Now that I have a little girl, there's been a whole new world of crafty fun around here. The first thing I made her was a pair of open toed sandals from a pattern available over at I Think Sew. 


I think they turned out great, so I whipped up a matching hairbow real quick.


Then I realized she has absolutely nothing to wear these with, so I just listed them both in My Etsy Shop.

I'm working on a pair of these in white to go with all her summery dresses, and a pair in red for her fourth of July outfit. You can mix up the toe accents (or make them interchangeable) and the possibilities are really endless.

Saturday, October 6, 2012

{The Big Boy Room} Part One- Child's Name Bunting with tutorial.


Since we're expecting our second baby in January, it's time to clear the nursery! Accordingly, I've taken on a new project: decorating the toddler's new big boy room. Unfortunately, this also means giving up the momcave (AKA my sewing room). So before we paint or make any major changes to the room, I want to get all of the sewing projects done before my machine gets evicted and relocated to the chilly basement. So far, I plan to do a set of coordinating flag pennants/buntings to hang from the ceiling, this name bunting for the wall above his bed, and a matching bean bag (photos coming soon!). 

I started choosing my fabrics and colors with a trip to IKEA. Z picked this bedding, and since we got a smokin' deal on it, I bought a second set to use for bunting/beanbag fabric. We picked some coordinating curtains that were (lucky me) way too long, so I was able to hem them and use that spare fabric as well.

If you'd like to make yourself a snazzy bunting like this, you'll need the following:
  • A few different coordinating fabrics (good project for scraps)
  • (Optional) White fleece or felt for backing.
  • Black (or your choice) fabric for letters
  • A computer with a printer (unless you're lucky enough to have a silhouette machine or cricut)
  • Paper/cardstock/cardboard/etc and a pencil to make your pattern
  • A ruler 
  • Fabric scissors and (optional) rotary cutter.
  • Heat 'n Bond or Wonder Under (to attach letters)
  • 2-3 yards of double fold bias tape or quilt binding in white. (Can also make your own bias tape from fabric or ribbon)
To make the pattern:
  1. Decide what size you want your pennants to be. I went with 6" wide by 9" long. Using your ruler draw out a triangle according to your measurements. This is your pattern. Cut it out.
  2. Choose how many flags you want of each color, and trace your pattern on to the wrong side of your fabric. If you turn the pattern upside down every other time, your triangles should fit next to each other with no fabric wasted in between. Cut these out using your rotary cutter or fabric scissors and set aside. 
  3. Iron a sheet of heat n bond or wonder under onto your black fabric. The size you need will depend on the name and your font size, but 8.5"x11" worked well for me. Leave the paper backing on for now.
  4. To create your letters using a computer, open up your word processing program. Choose a font you like, and type in the letters of the name. If your name has repeat letters, you only need to type one of each letter. I used a font size of 200, but you might need to experiment and see what you like best. Once your letters are printed, cut them out and trace them **BACKWARDS** on to the heat n bond paper (see below).


Don't forget to trace it backwards!


   5. Cut your letters out carefully, leaving the paper backing on. You should have something similar    to this:


      6. Once you've cut out all your letters, lay out your pennants in the order you'd like them. Peel the paper backing off each fabric letter,  and place them in the center of each flag, leaving enough room on top of the pennant for your bias tape to overlap.  Iron them on one at a time.


      7. If you've opted to put a layer of backing on your flags, now's the time to attach it. Pin flags and backings, wrong sides together, and sew around your flag using a 1/4" seam allowance.

      8. You're almost done! It's time to attach the flags to your bias tape. Place flags in desired order, end to end so that corners are touching, but not overlapping. Unfold your bias tape once, and place flags in order at the crease of the tape. Be sure to leave a few inches of spare tape at the beginning and end of your bunting for hanging. When you fold your tape back over, you should have the same width of tape overlapping the front of each flag as the back. Pin in place, then stitch the entire length of your bias tape at the open end.

      9. Hang in desired location to make an extremely adorable space.


Saturday, December 24, 2011

Thrifty Gifting Part 3: Embellished Cowl Tutorial.

Fabric Flower Cowl
Yoyo Cowl

These cowls are one of the easiest items you can make. They're great as inexpensive gifts or as a treat for yourself! First, head to Target or Walmart. Peruse the $5 scarves, and choose the color/pattern you want.
$5 Walmart Scarf

I was able to score this one for $3!


Next, remove any tags.

And any frills...
or tassles.

Fold ends together so the right sides of your fabric are inside, and stitch together about 1/2 inch from the edges. 

That's it! Your cowl is finished. Embellish with a fabric flower, or yoyos.

Remove any leftover cats from your gift boxes, and place your awesome gift inside!


 Gift giving made easy.