Friday, June 28, 2013

{getting crafty} DIY Baby Barefoot Sandals Tutorial {10 minute craft!}

Disclaimer: I was lazy and took photos with my iphone. I apologize to anyone reading this for the out of focus, grainy images, and I apologize to my DSLR camera- next time I'll dust you off and let you do your thing.

 So,  in college I worked at an amazing summer camp.

Every year, the staff got at least 3 different new t-shirts, plus our choice of leftover shirts from previous years. I have a collection of probably 25-30 tees just from this camp.


I don't wear t-shirts as much these days, but have saved each and every summer camp shirt to make a t-shirt quilt. You know, when I get around to it. Someday.
 

But I digress. This isn't about t-shirts or summer camp, no matter how awesome said summer camp may be. (But seriously, if you're from Colorado and have kids who are 8 or older, you're neglecting them if you don't send them here.) But you'll see why the t-shirt story is important shortly. Anyway, back to the barefoot sandals.


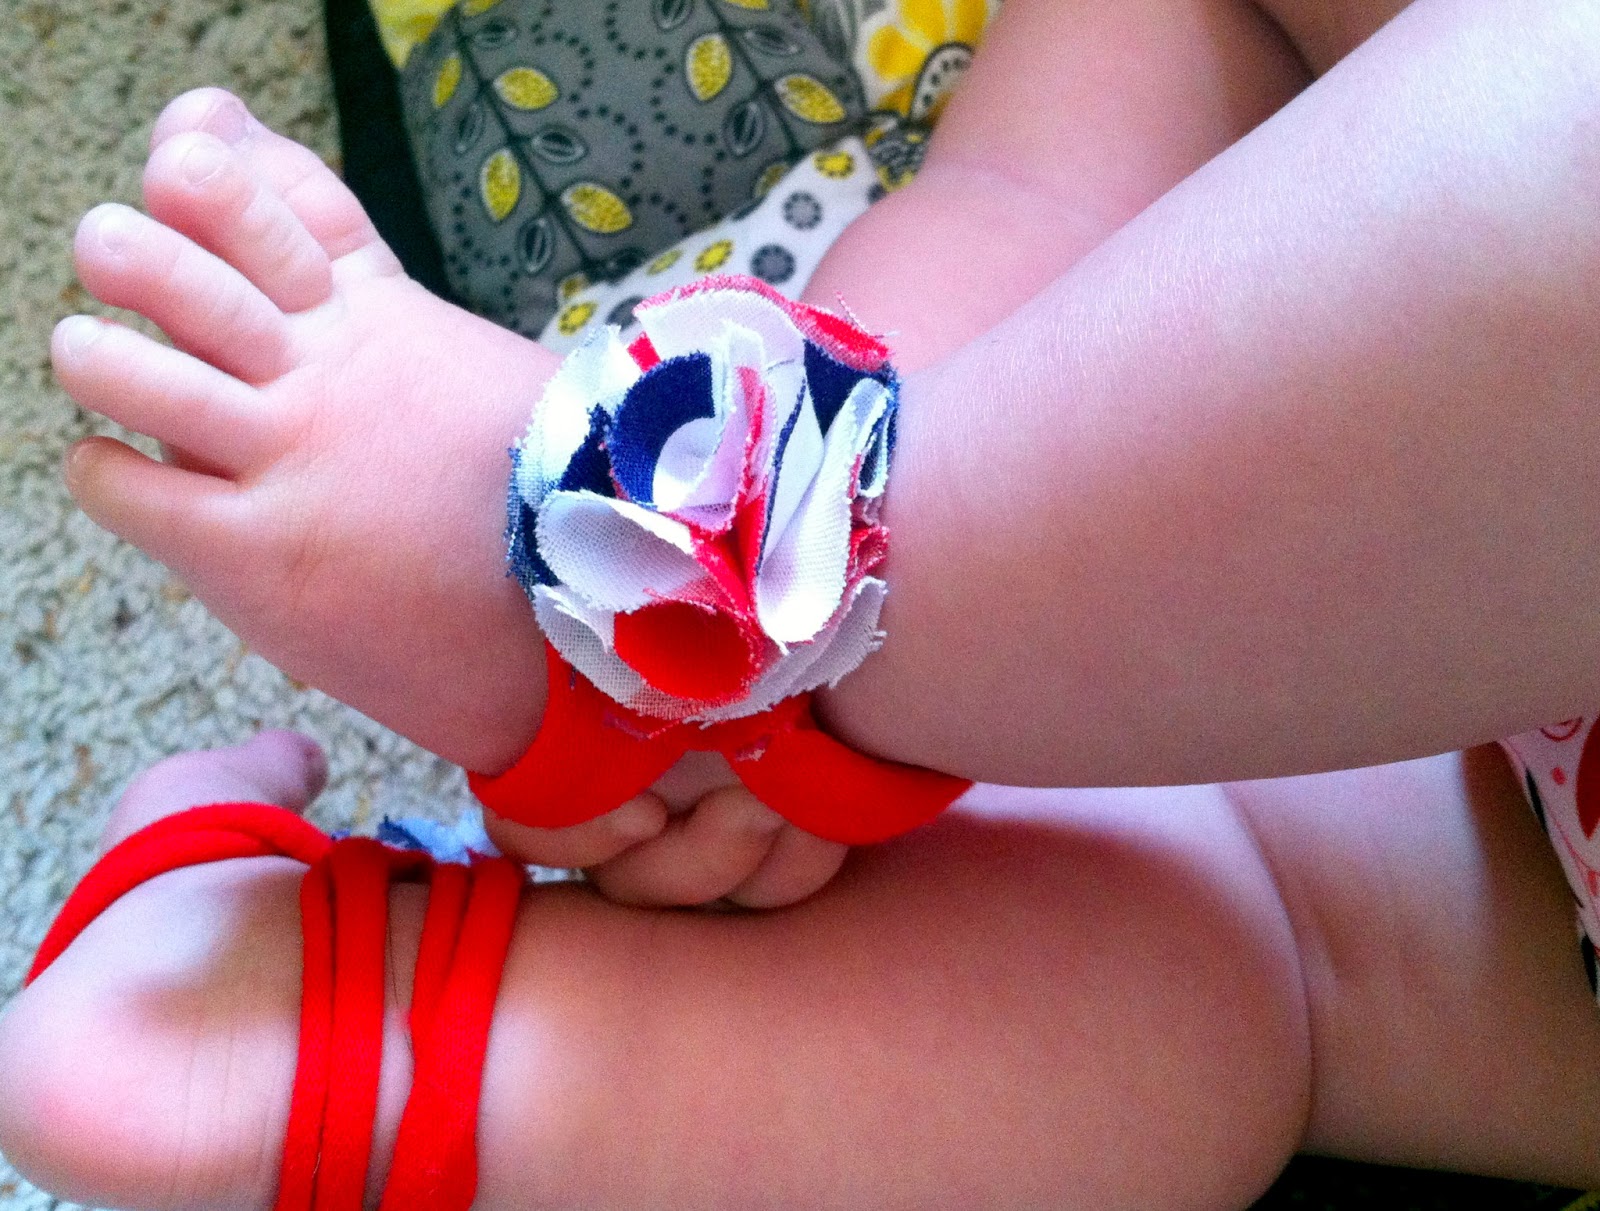
Aren't they adorable?


I discovered this style of baby shoes existed just yesterday, and LJ still NEEDS a pair of shoes to go with her 4th of July outfit, which she'll be wearing in 6 days. They looked easy enough to make, so I looked at a few different methods, and combined them into one that I thought would be super easy. And it was!


Want to make your own?

Here's what you'll need:
An old T-shirt you won't mind cutting
Pen or fabric marker
Fabric glue or a hot glue gun
Pudgy baby feet to put them on.
        And that's it!

{optional}
quilting weight cotton, lace, tulle, or other fabric for your fabric flowers.
pearls, gems, or buttons if you want one in the center of your flower.
pinking shears


First, get your pieces ready.  Lay out your t-shirt and cut off the bottom hem. Then, cut a strip straight across off of the bottom of your tee. Mine was about 1.5 inches wide, but I think I would go with about 1" next time. Set your shirt aside. Now you should have a big ring of t-shirt fabric. Stretch the ring until it starts to curl up and resemble an oversized noodle. Make one cut through the ring so that it becomes a long strip. 


 Next, Measure your baby's feet, or eyeball it if you're brave. You want a strip of fabric that's long enough to circle around from the top of baby's foot, to the sole at the arch. For my 4 month old, I cut 4 inch strips from my big t-shirt noodle. You'll need to cut 6 strips of the same size for the sandals pictured, but you could also cut only 4 strips and this would work. LJ's feet are so tiny, I think next time I'll do only 4 strips. 


You'll also want to eyeball your baby's feet and decide how big you want your fabric flower to be. I went for one that was close to the width of her foot, but it just depends on your preference. You'll want to make a circle exactly the size of the flower you want. I happened to have a spool of thread to trace, but you can use any round object you can find that's the size you want, or you can just draw a circle that size on some paper and cut it out. Using your tracing object, trace out 2 circles on to your t-shirt. These will be the tops of the sandals, where the flowers will attach.

Pieces for one shoe.
Next, grab the t-shirt you set aside, or whatever you want to use for your flower fabric. For my flowers, I used a leftover scrap from the dress she's wearing them with. Trace 18 of your circles onto your fabric (you'll need 9 for each flower). If you're doing a gem/pearl/button center on your flower, you'll only need 16 circles.  Cut out all of your circles. 

You should now have 6 strips of fabric, 2 base circles, and 18 flower fabric circles. Getting those ready was the longest part of this craft, and once you do that, the rest will only take a few minutes.


Grab one of your flower circles and put a tiny dab of glue in the center, then fold in half and pinch until the glue sets.


It should be able to sit on its own and keep a semi-circle shape.


Next, put a dab of glue in the middle of the flower, right at the straight edge. Fold in half again and pinch. 

 
The petal should hold this shape on its own.

Repeat x7 so you have 8 petals made. Leave your base circle and one other fabric circle as is.

 
8 petals, one flower fabric circle, one base circle.


Almost there.

Now lay your base circle right side up (if yours has a right side). Put a tiny dab of glue on the little point of one petal.


Glue your petal down as pictured.

Glue down 3 more petals, until your base circle is covered.


At this point you should have 4 petals glued to your base, 4 loose petals, and your extra circle. Now, glue your second layer of petals down, alternating the placement so the center of your 2nd layer petal covers the crack between the first layer petals, as pictured below.


Add your remaining 3 petals so your flower now has 2 layers with 4 petals each.
At this point, if you want to do a flower with a gem or pearl center, just glue down your gem or pearl. I have neither of those things, so I used a button to give a general idea of what the flower will look like.


If you prefer a fluffier, pom-pom like flower, grab that 9th circle you cut out. 
Fold it in half as before.


 This time, begin rolling your semi-circle from one end.

like I said, iphone pictures.


Finish rolling until you have a cone, the base of which resembles a rosebud.


 Dab a bit of glue toward the end of rolling, to keep it together.

Put a decent amount of glue on the point of your cone, and press the cone down into it until it sets.


Your flower should now resemble the picture below.


To give it some fluff, dab some glue on the top of each of the 4 petals in the second row.

See that dab of glue at 12:00?

Pull each petal up and stick it to that center cone until the glue sets. Voila.


Time to add straps. Flip your flower upside down. 


 I made a line of hot glue down one side, and attached 3 of the straps like this.


Then, reach the opposite end of each strap around in a ring, and attach it on the opposite side of your circle.


Finish all straps and repeat for your second shoe, and you're done!


Now the fun part. Put baby's foot through all 3 rings of the sandal.


Pull the rear one or two straps behind baby's heel. I prefer the look of two straps on the heel.


She's ready to hit the runway!


Some other flower variations: 

This  flower was cut with pinking shears.


Button (or gem or pearl) center.


Remember that lonnnnng strip of tshirt you cut into strips? The remainder rolls up into a cute rose! This shoe would literally take 2 minutes to make.


The possibilities are really pretty endless with these sandals. You can pretty much make and attach any fabric flower you like, or buy pre-made ones at walmart the craft store. Instead of flowers, these would look great with bows, fabric yo yos, even large decorative buttons. Can you think of anything else that would be adorable on these shoes?


They even go with fluffy baby butt, but really, what doesn't?


Monday, June 24, 2013

{a new sewing adventure} Baby Bow Sandals!


Well I've had a not-so-brief hiatus, due to a pregnancy that made me very sick but resulted in a gorgeous baby GIRL! Then there was the whole trying to balance two kids thing, but I'm back in the swing of things and hope to keep up with {super important things like} my blog this time.

Now that I have a little girl, there's been a whole new world of crafty fun around here. The first thing I made her was a pair of open toed sandals from a pattern available over at I Think Sew. 


I think they turned out great, so I whipped up a matching hairbow real quick.


Then I realized she has absolutely nothing to wear these with, so I just listed them both in My Etsy Shop.

I'm working on a pair of these in white to go with all her summery dresses, and a pair in red for her fourth of July outfit. You can mix up the toe accents (or make them interchangeable) and the possibilities are really endless.

Monday, November 26, 2012

{kitchen adventures} Sneaky Veggie Yogurt Pops


With the terrible twos quickly approaching and incisors growing in, I'm 100% serious when I say the healthiest thing I can currently get my toddler to eat is a popsicle. Before you go clicking the little x in the corner, you should know that these yummy yogurt pops have about 5 grams of protein. They're also packed with fiber, tons of potassium and vitamin C, and lots of iron, because each one contains about 3 TBSP of spinach. These also contain around 4g of sugar from fresh fruit, as opposed to a store bought popsicle, which can contain around 12g of sugar from high fructose corn syrup.

Even with winter approaching, these continue to be such a hit around here that I wanted to share the recipe. 

For the fruit/veggie portion, you could use any of the other puree recipes I have here, but I usually make my yogurt pops in strawberry banana flavor.

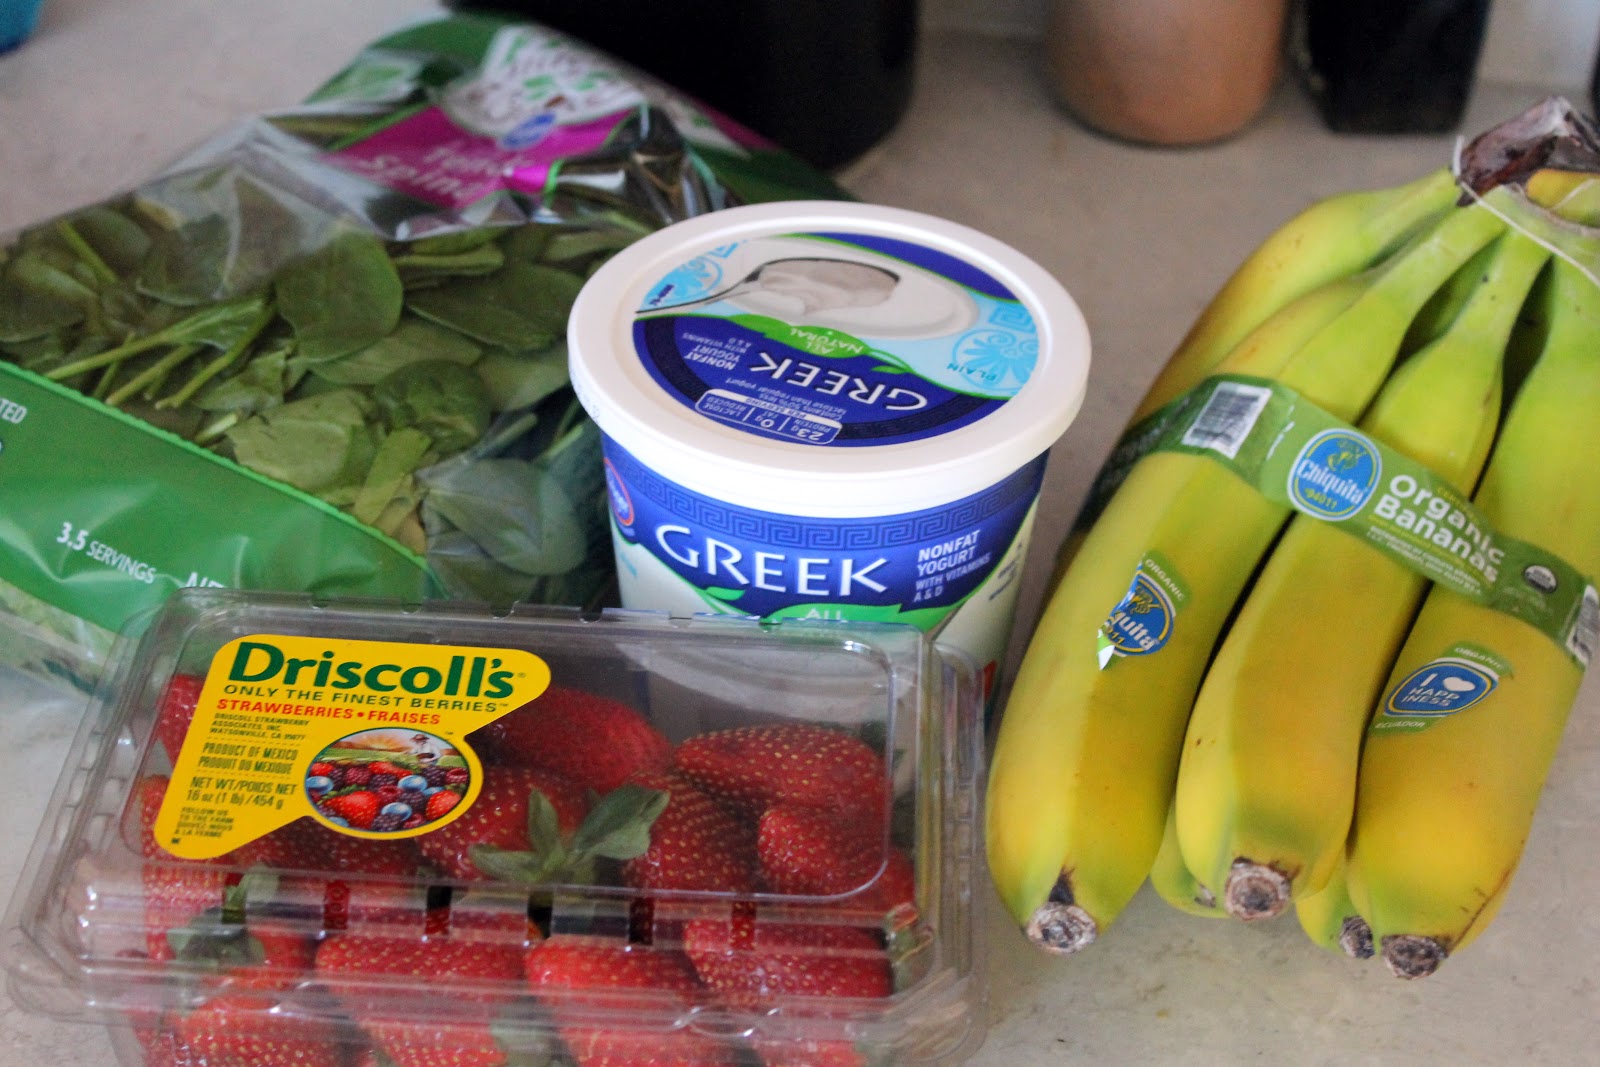
You'll need:
3 ripe bananas
2 heaping cups fresh spinach, rinsed
3/4 pint fresh strawberries, rinsed and stemmed
1.5 cups plain greek yogurt 


Since fat is such a key component to brain development in children and my child rarely eats enough of it, I like to get full fat greek yogurt when I can find it. However, you can also choose fat free or 2% depending on your needs. Just be sure to choose a brand that contains at least 24g of protein in a 1 cup serving.

Optionally, you can add a little honey, agave, or orange juice if you don't think these are sweet enough, but my little guy devours them just the way they are! Another great way to sweeten the recipe is to simply add an extra banana.


Start by sauteing the spinach in a little bit of olive or coconut oil. Again, I want to increase the healthy fat content of these as much as a I can, so I was really generous with the amount of olive oil I used. While the spinach is cooking, break the bananas in quarters and toss them in your food processor, along with your stemmed strawberries.

You'll want to saute the spinach just long enough that it starts to wilt.


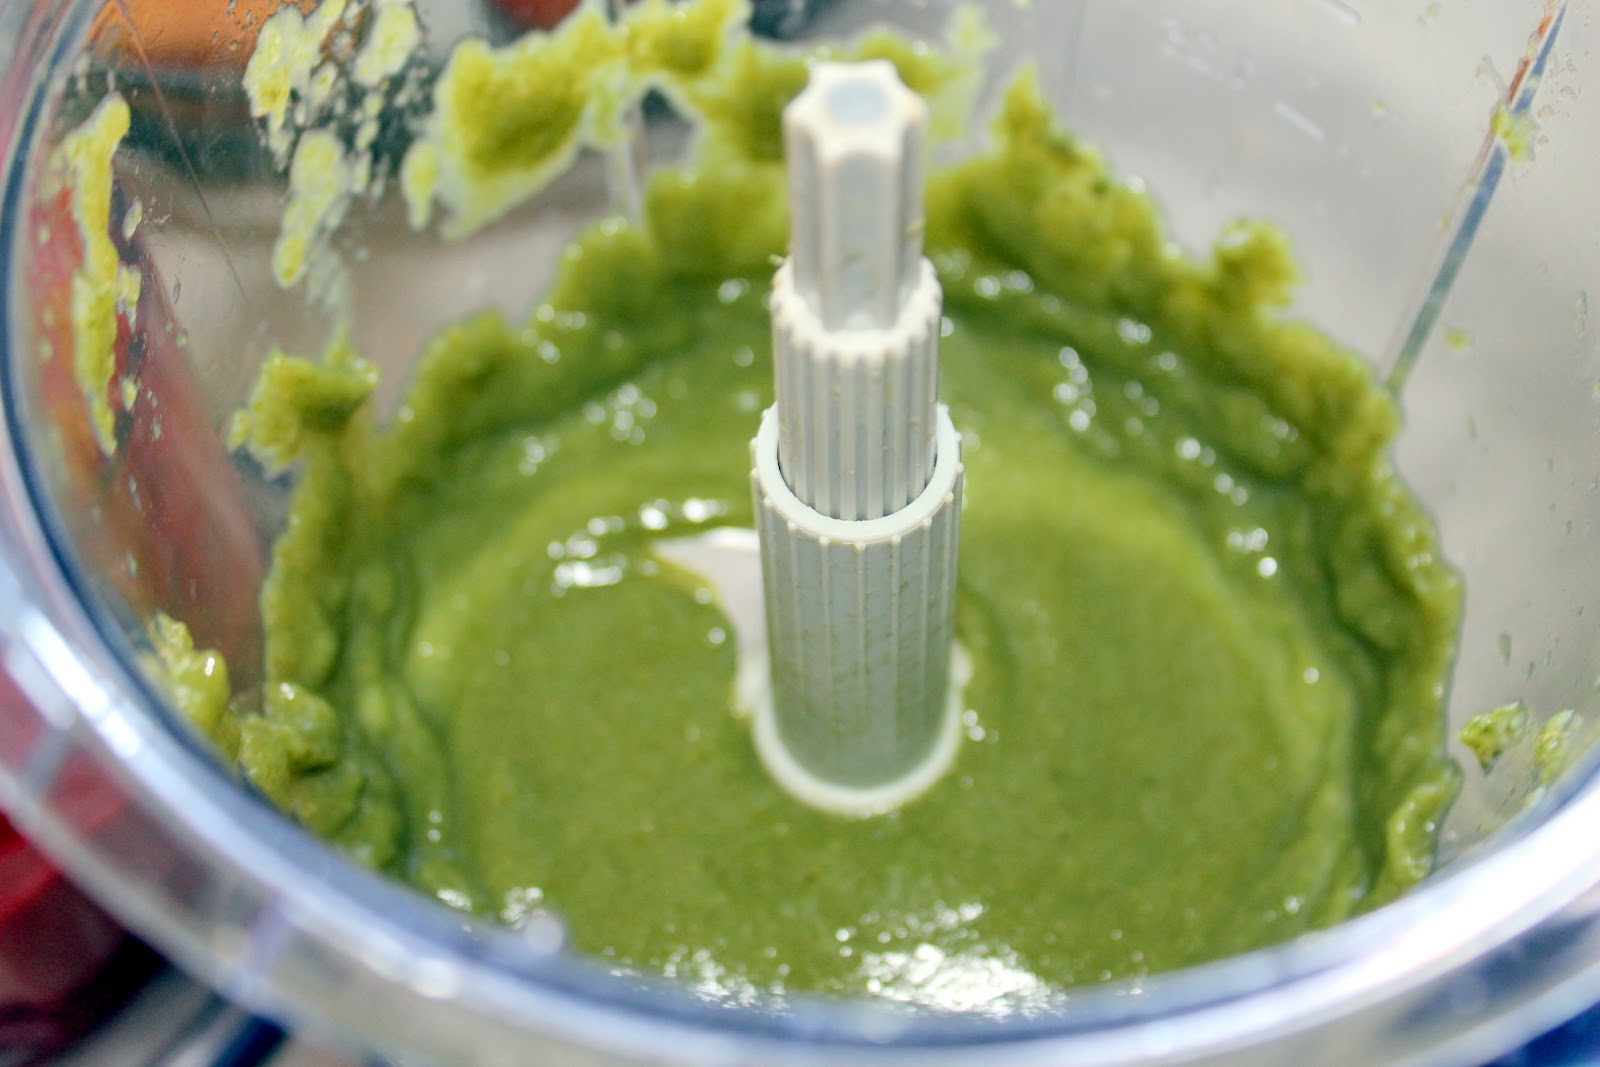
Once the spinach is finished cooking, toss it into the food processor with your fruit. Pulse and puree until smooth. 
 
Or let a little helper do the blending.


Add your yogurt and mix again until blended. 


At this point, you or your child can do a taste test. If the spinach flavor is too strong, you can add more strawberries. If you want it a bit sweeter, toss in an extra banana. You can also opt to sweeten with honey, agave, or orange juice if you'd like. Once the puree is to your kiddo's liking, pour into popsicle molds. I found these great ones for $1 at Ikea. This recipe made 12 pops of this size, so I needed to use 2 molds. 


Freeze at least 4 hours, and enjoy!


Just don't serve too cold.


Tuesday, November 6, 2012

Melissa And Doug Terrific Twenty List and Giveaway!


Let me start by saying how much we love Melissa and Doug toys up in here. Almost a year ago, we gave our one year old this Frolicking Frog Pull Toy, and he still plays with it every day. Whether he and "Froggy" are running circles in the kitchen...


 Waiting at the front door for daddy to come home...


Or exchanging a little kiss before naptime, "Froggy" is always close by. 

November has snuck up on me suddenly, but this means holiday gift shopping is right around the corner! It also means the little guy has a birthday in just a few weeks (four weeks if you're counting, but I don't want to talk about it). I've always loved educational toys, but with a new baby on the way, we decided this year's gifts need to not only be educational, but QUIET and engaging. I can't think of a better place to look than Melissa and Doug, who recently released their top 20 holiday gift picks, or the Terrific Twenty, as they call it. Our holiday wishlist for the little one already includes their Latches Board, Wooden Play Food, and Wooden Big Rig Trucks Set, so I was excited for the chance to check out the Terrific Twenty list and to give you two different ways to win a toy from this list!

The first way to win is to visit Melissa and Doug's Facebook page where you can enter daily to win a different item from their Terrific Twenty list.

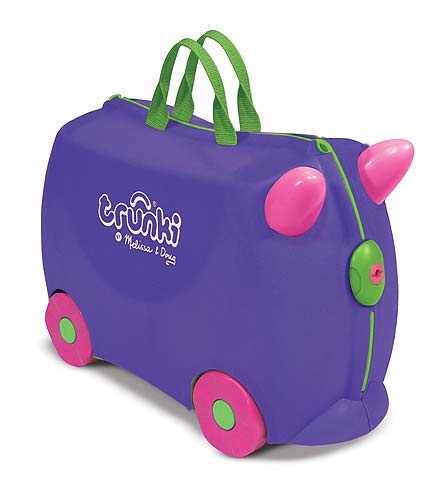
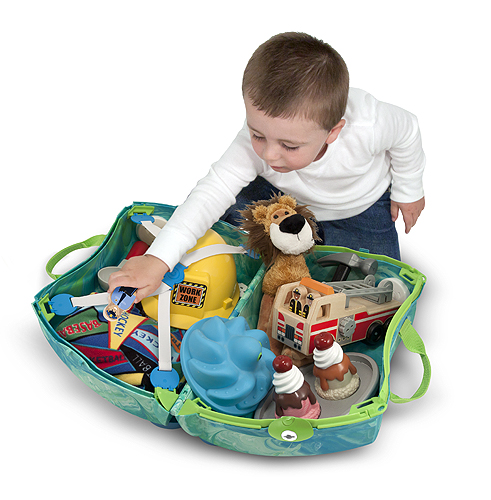
The second way is to participate in my rafflecopter giveaway. My Z loves to stash all his "treasures" and bring them with him all around the house. Combine this with his love of "horse ride" -ing anything that he can sit on, and I think he would absolutely LOVE to get his hands on a Trunki. What's more, I think your little one would too!


To win the Trunki, simply follow the directions in the rafflecopter. Good luck and happy holiday shopping!

a Rafflecopter giveaway

Saturday, October 6, 2012

{The Big Boy Room} Part One- Child's Name Bunting with tutorial.


Since we're expecting our second baby in January, it's time to clear the nursery! Accordingly, I've taken on a new project: decorating the toddler's new big boy room. Unfortunately, this also means giving up the momcave (AKA my sewing room). So before we paint or make any major changes to the room, I want to get all of the sewing projects done before my machine gets evicted and relocated to the chilly basement. So far, I plan to do a set of coordinating flag pennants/buntings to hang from the ceiling, this name bunting for the wall above his bed, and a matching bean bag (photos coming soon!). 

I started choosing my fabrics and colors with a trip to IKEA. Z picked this bedding, and since we got a smokin' deal on it, I bought a second set to use for bunting/beanbag fabric. We picked some coordinating curtains that were (lucky me) way too long, so I was able to hem them and use that spare fabric as well.

If you'd like to make yourself a snazzy bunting like this, you'll need the following:
  • A few different coordinating fabrics (good project for scraps)
  • (Optional) White fleece or felt for backing.
  • Black (or your choice) fabric for letters
  • A computer with a printer (unless you're lucky enough to have a silhouette machine or cricut)
  • Paper/cardstock/cardboard/etc and a pencil to make your pattern
  • A ruler 
  • Fabric scissors and (optional) rotary cutter.
  • Heat 'n Bond or Wonder Under (to attach letters)
  • 2-3 yards of double fold bias tape or quilt binding in white. (Can also make your own bias tape from fabric or ribbon)
To make the pattern:
  1. Decide what size you want your pennants to be. I went with 6" wide by 9" long. Using your ruler draw out a triangle according to your measurements. This is your pattern. Cut it out.
  2. Choose how many flags you want of each color, and trace your pattern on to the wrong side of your fabric. If you turn the pattern upside down every other time, your triangles should fit next to each other with no fabric wasted in between. Cut these out using your rotary cutter or fabric scissors and set aside. 
  3. Iron a sheet of heat n bond or wonder under onto your black fabric. The size you need will depend on the name and your font size, but 8.5"x11" worked well for me. Leave the paper backing on for now.
  4. To create your letters using a computer, open up your word processing program. Choose a font you like, and type in the letters of the name. If your name has repeat letters, you only need to type one of each letter. I used a font size of 200, but you might need to experiment and see what you like best. Once your letters are printed, cut them out and trace them **BACKWARDS** on to the heat n bond paper (see below).


Don't forget to trace it backwards!


   5. Cut your letters out carefully, leaving the paper backing on. You should have something similar    to this:


      6. Once you've cut out all your letters, lay out your pennants in the order you'd like them. Peel the paper backing off each fabric letter,  and place them in the center of each flag, leaving enough room on top of the pennant for your bias tape to overlap.  Iron them on one at a time.


      7. If you've opted to put a layer of backing on your flags, now's the time to attach it. Pin flags and backings, wrong sides together, and sew around your flag using a 1/4" seam allowance.

      8. You're almost done! It's time to attach the flags to your bias tape. Place flags in desired order, end to end so that corners are touching, but not overlapping. Unfold your bias tape once, and place flags in order at the crease of the tape. Be sure to leave a few inches of spare tape at the beginning and end of your bunting for hanging. When you fold your tape back over, you should have the same width of tape overlapping the front of each flag as the back. Pin in place, then stitch the entire length of your bias tape at the open end.

      9. Hang in desired location to make an extremely adorable space.


Monday, March 12, 2012

{kitchen adventures} Chocolate Covered Cinnamon Bears- or as I like to call them: Crack.


Life is full of little mysteries. Which came first, the chicken or the egg? Did London Bridge ever fall all the way down? Which armrest is yours at the movie theater? And most importantly, WHY are two seemingly unmixable ingredients -chocolate and cinnamon bears- so delicious together? I don't think that last question can ever truly be answered. It just doesn't make sense, and it never will.

Either way, it was a gorgeous spring day, the little man and I went out on a picnic, and this was the perfect after-lunch treat. (He has to wait until he's older though, which is fine by me. Until then, I'll eat enough for the both of us.)

These are super simple to make. I've seen recipes that involve corn syrup and a lot of ingredients, but I made them by simply melting Baker's Milk Chocolate squares, and dipping the cinnamon bears in, then laying them on wax paper to cool. Easy peasy, lemon squeezy.

Try them sometime! I'd share, but I'm about to eat the whole bowl while catching up on Once Upon a Time. Yum.


{kitchen adventures} Homemade Baby Food Pouches With Fruits and Veggies.

Don't have a baby or toddler like this one? You should get one; they're great! In the meantime, these recipes can also make yummy, healthy fruit yogurts and smoothies for grown ups.


Pink Puree and Green Puree. Yum!


 Recently, we ran into a big problem. My veggie-loving baby turned into a toddler and decided to boycott anything that isn't a cracker or a banana.  I tried making veggies look like crackers. They were thrown on the floor. I tried baking them into crescent rolls. Those got picked out. I added them to soups and chilis. They were eaten around, and (I know it seems impossible, but)  I got sick of having chili every night. Pureeing vegetables and hiding them in pasta sauce was working alright, but giving my kid noodles and pasta sauce at every meal wasn't sensible either. 

I started buying these pouches from HAPPYBABY Organics,  and he loved them! But $2 a pouch can really add up, and my granola-loving side was concerned about feeding him processed food that wasn't homemade. I tried to make veggie purees like I did when he was just starting solids, but he didn't care for the taste, and he wasn't interested in anything he couldn't easily eat with his bare hands. 
Then a friend mentioned that she makes fruit and veggie combo purees and feeds them to her toddlers in squeeze bottles, so I decided to give it a try. I was only able to find a couple different products made specifically for squeezing out purees, and eventually decided on "The Sili Squeeze" reusable pouch, after another acquaintance ordered some for her children. For the record, this thing is awesome, and I would highly recommend it to anyone who wants to feed yogurt, purees, or smoothies on the go.

Now that I had the pouch, it was time to go to work. I started experimenting, and came up with these recipes, which all turned out to be big hits with the little guy. Every puree listed tastes like fruit rather than vegetables. And check out the colors! What kid doesn't love colorful food?

Pink Puree  (Loaded with Vitamin C,  Vitamin A, Iron, Potassium, and Calcium)
3 bananas
1 lb ripe strawberries
1 medium red beet


Green Puree  (Lots of Iron, Vitamins C & E, and Beta-Carotene)
5 medium pears
1.5 cups fresh baby spinach
2 mangoes

Orange Puree (A little bit of everything, rich in Omega-3s) 
5 medium yellow peaches
2 medium carrots
1/2 cup diced pineapple
1 banana
3/4 cup spinach
1 medium avocado


Purple Puree  (Tons of antioxidants, Iron, and Vitamin A)
4 bananas
6-8 oz fresh or frozen (no sugar added) blueberries
1 medium red or white beet


Prep: Once you have your ingredients, wash them. Remove peels, cores, and pits, and dice large fruits and veggies into 1-2 inch cubes. Defrost any frozen fruits.


Spinach, mangoes, and pears ready for steaming.

After 10 minutes, it's ready to go!


Steam: Spinach and anything firm (consistency of an apple) needs to be steamed. Any fruits that are very ripe should puree easily without steaming, but when in doubt, I just throw them in the steamer. Check periodically to make sure fruit isn't turning brown. Beets could take upwards of 30 minutes to steam, but anything else should be done steaming in 8-10 minutes.


Blend: After everything is steamed until tender, place fruits and vegetables into a blender or food processor and process until you reach a smooth, uniform consistency.


Pink Puree, finished and ready for storage.


Store: For food safety, it's recommended to immediately freeze any fresh purees you won't be using within 24-48 hours. One popular method is to make the purees into "ice" cubes using an ice cube tray, and transferring to a freezer bag within 12-24 hours. There are also products made specifically for freezing baby food, but I prefer 1/2 cup gladware containers. You can pick up 8 of these for about $2. I also like to transfer frozen purees into a freezer bag to save space. 


Feed! You've got several choices here, as there are lots of ways to prepare these.


For homemade baby food pouches: it's time to defrost these puppies and toss them into a squeeze bottle. *WARNING: Kids might ask to repeat this step multiple times. When I serve this as part of a meal, I just defrost the puree in a bowl and let him practice using his spoon to eat it. Either way, he can't get it into his mouth quickly enough.

Quick and easy smoothie: To change things up, mix 50/50 with some plain greek yogurt and your toddler's milk to add protein. Just leave the puree frozen and toss everything in a blender or food processor. For added carbohydrates or iron, toss in a few tablespoons of baby oatmeal. These are great for adult smoothies too, just try not to keep all the fruity goodness to yourself.

Healthy fruit yogurt: I've also stirred these into greek yogurt to make a healthy, homemade fruit yogurt for myself or the little man.